How to Install Facebook Pixel on Shopify in 5 Minutes

As a Shopify owner, you need to add the Facebook Pixel to track your customers’ data and more. Facebook provides a small code that can track page views, add-to-cart actions, and much more.
So, how do you add the Facebook Pixel to Shopify?
- Connect Shopify store to Facebook Events Manager.
- Install Facebook & Instagram app and enable data sharing.
- Select pixel and confirm setup in app.
- Go to Facebook Business Manager > Settings > All tools > Events Manager.
- Click “Connect Data Source” and connect a new data source.
- Create a New Dataset.
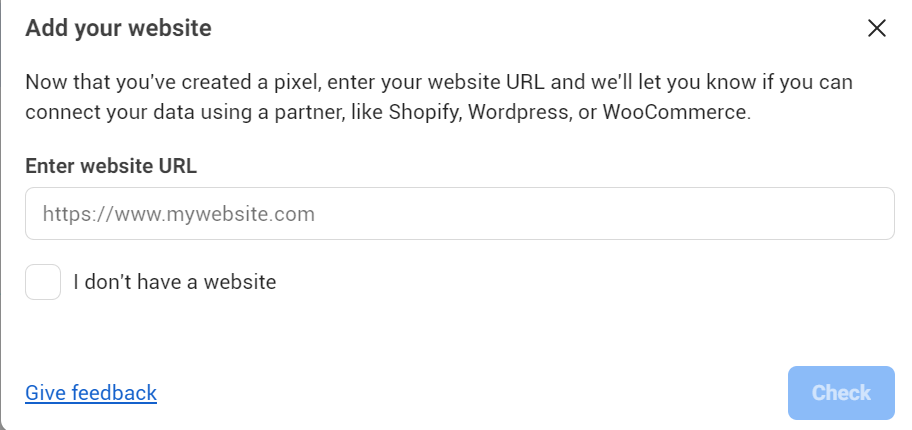
- Enter your website URL to check and click Next.
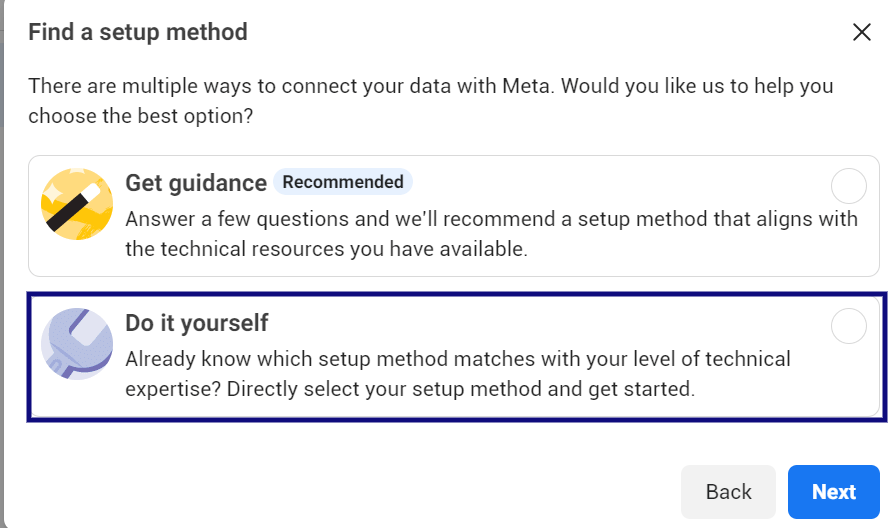
- Click “Do it Yourself” for setup method.
- Click Meta Pixel and Conversions API to connect website.
- Click “Setup With Partner Integration”.
- Choose Shopify as partner.
- Install Facebook and Instagram App in Shopify.
- Connect Facebook and Business Accounts in sales channel.
- Enable maximum data sharing in preferences.
- Link pixel to dataset to start tracking.
- Read and agree to Terms and Conditions.
- Submit for Review.
- Verify website in Facebook Event Manager.
- Send test traffic and check pixel status.
- Click Next and Finish setup.
In this article, we will guide you through each of these steps in detail and provide additional tips and tricks to ensure a smooth setup process. Let’s get started!
What is Facebook Pixel?

The Meta Pixel, formerly known as the Facebook Pixel, is a piece of code provided by Meta. It’s like a behind-the-scenes detective, keeping track of customer activities on a website such as page views or adding items to a shopping cart. This valuable data is then used to enhance online advertising strategies.
Benefits of Adding the Meta Pixel to Shopify
There are many benefits of adding a Facebook pixel to Shopfiy, Which include:
- Understand your audience
- Create custom audiences
- Track conversions
- Refine bidding strategies
- Easy setup with Shopify
How to Install Facebook Pixel on Shopify Step-by-Step Guide
Before we dive into the steps below, make sure you’ve set up a Facebook Ads account. If you haven’t done so yet, please go ahead and create one. Once that’s done, we’re good to go!
Step 1#: First, go to Facebook Business Manager> Settings> All tools> Events Manager.
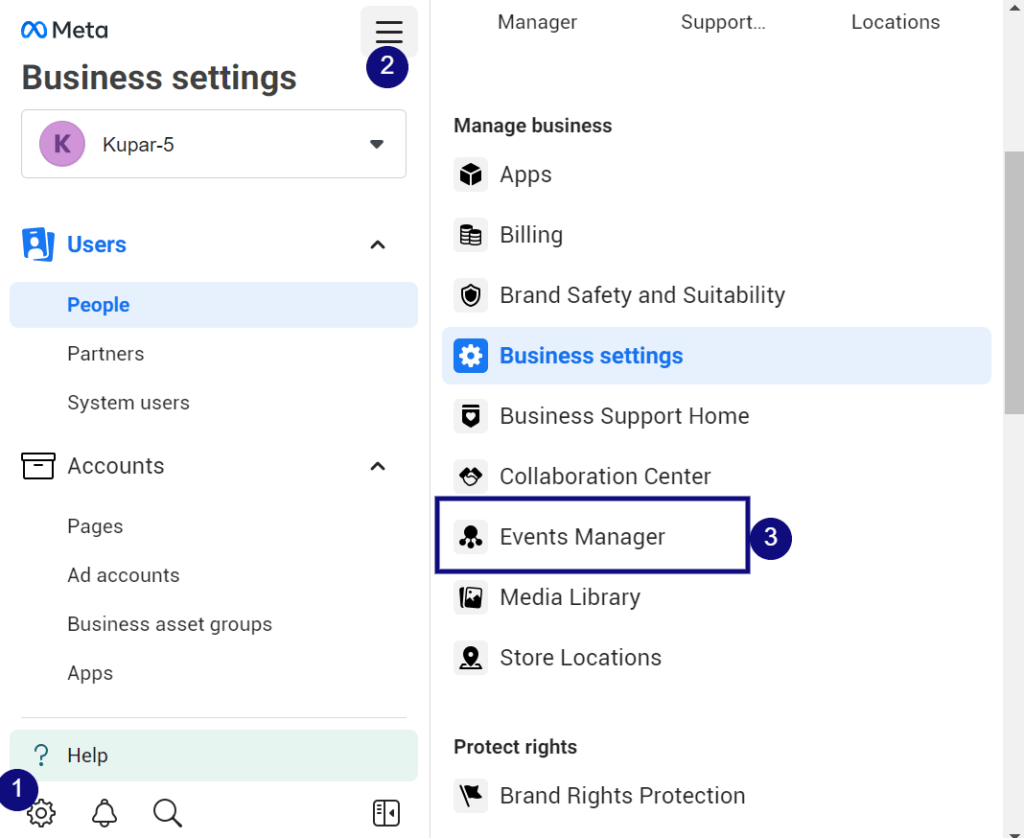
Step 2#: Look for the “Connect Data Source” button and hit “Connect.”

Step 3#: Connect a new data source window popup, click on the web, and hit connect

Step 4#: Next step, Create a New Dataset and hit on create
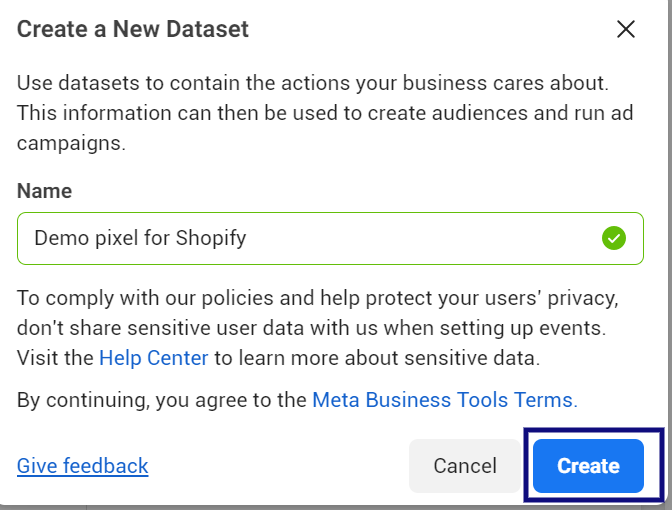
Step 5#: Enter your website URL to check and hit on Next
Step 6#: Find setup method, Click on Do it Your Self, and Click on Next.
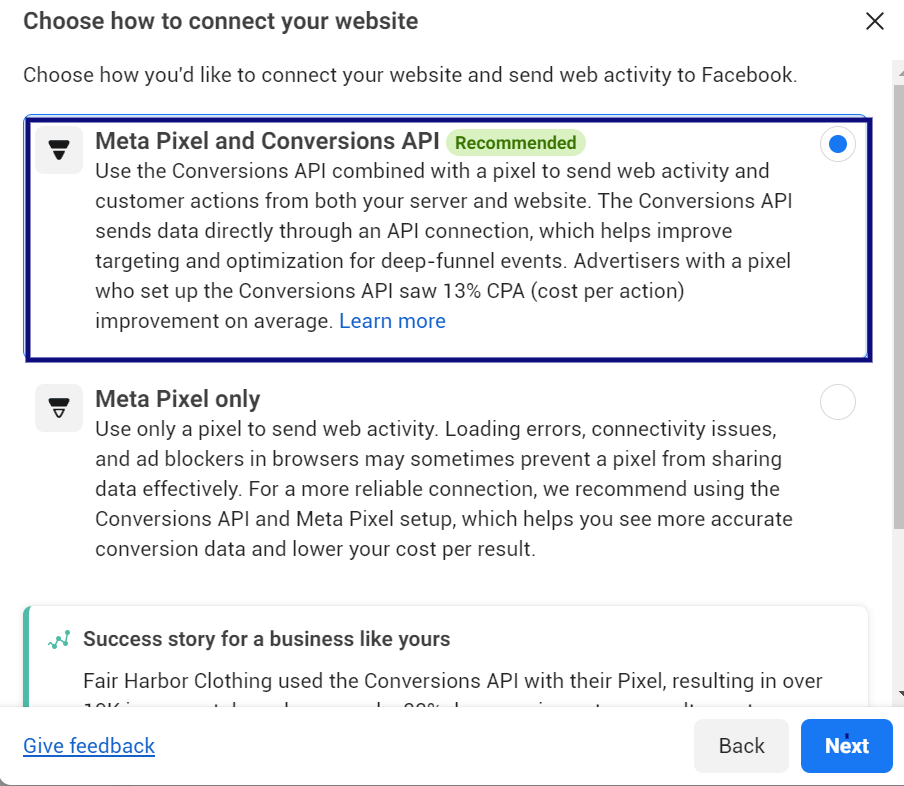
Step 7#: Choose how to connect your website section Click on Meta Pixel and Conversions API and click Next.
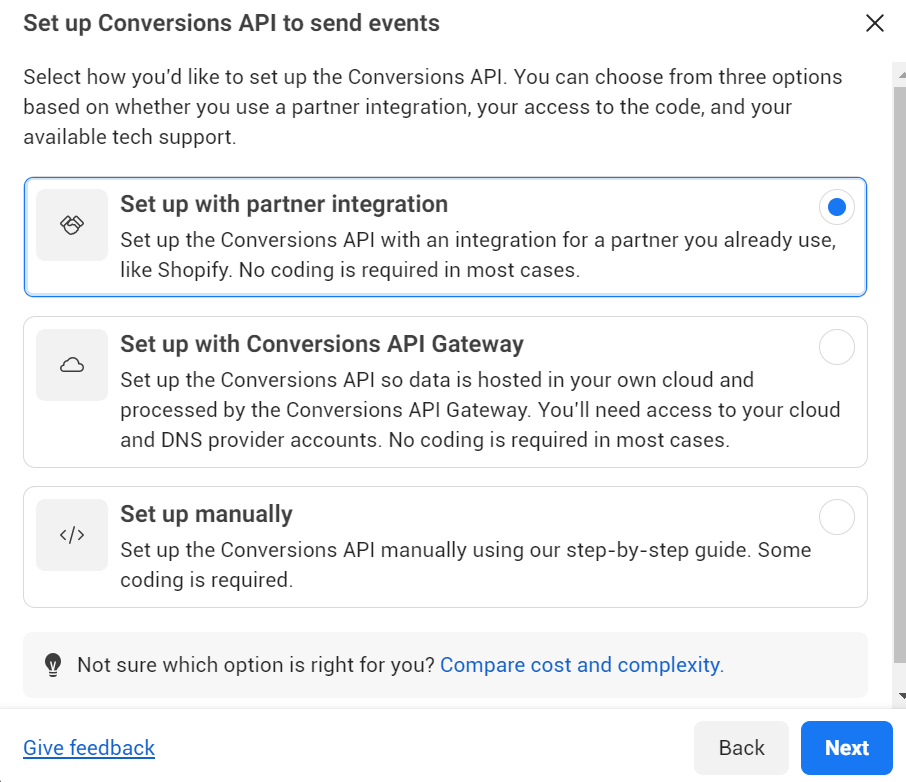
Step 8#: Setup conversions API to send events section, Click on Setup With Partner Integration, and Click Next.
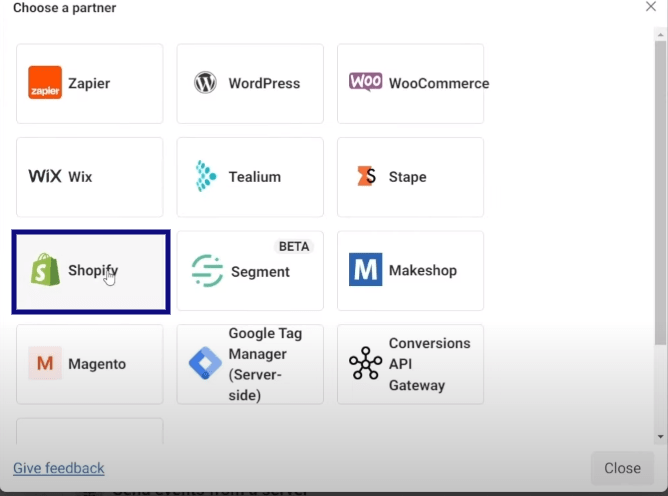
Step 9#: Choose a partner as Shopify.
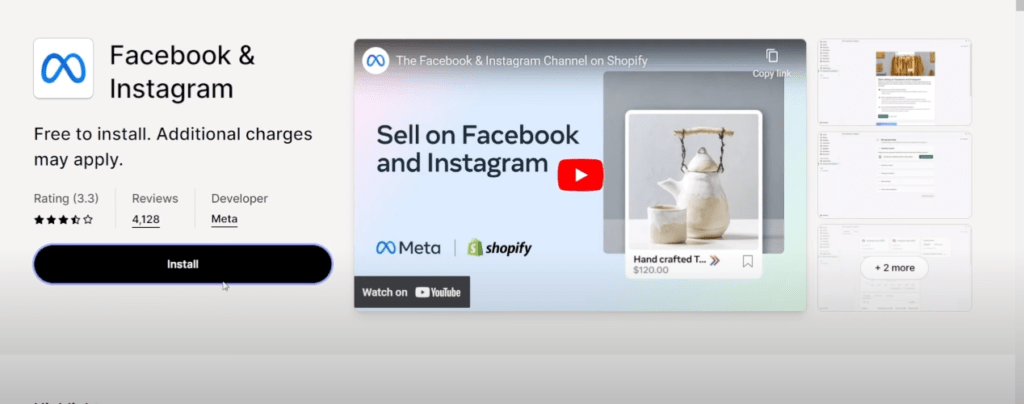
Step 10#: Connect Shopify with Facebook and Instagram. Go to Shopify admin>online store>preferences>Look for Facebook pixel and hit on Connect, you will be redirected to Facebook and Instagram App (sales channel) and Install the app.
Step 11#: Now, it’s time to setup Facebook pixel in Shopify. Go to your Facebook and Instagram sales channels and connect your Facebook and Business Accounts.

Step 12#: Click on Maximum in manage Facbook and Instagram data sharing preference and hit on Save.

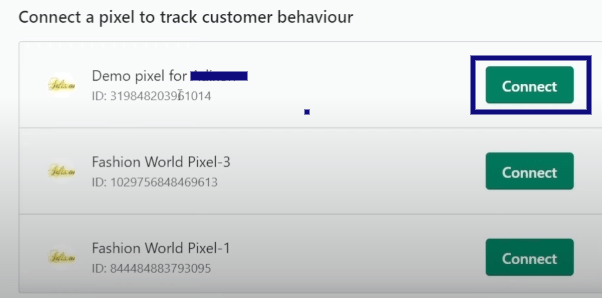
Step 13#: Remember the new dataset we created and named earlier? Now, it’s time to link the pixel to start tracking your customer’s behavior.
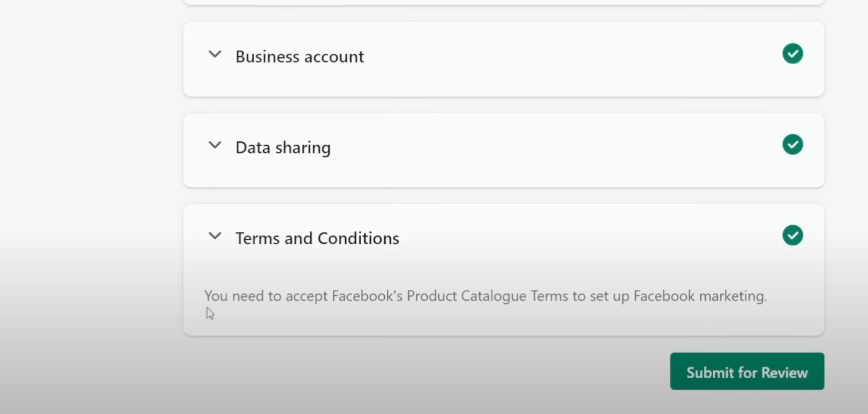
Step 14#: Please take a moment to read and agree to the Terms and Conditions, then hit ‘Submit for Review’.
Step 15#: Once you’ve submitted your review, it’ll take a few minutes to process. Go back to Facebook event manager to verify your website. Tick on “I’ve completed setup in Shopify” and Click on Next.

Step 16#: Enter your website to verify Facebook pixel working perfectly or not and Click on Send test traffic.

Step 17#: Once you’ve sent the test traffic, your Shopify website will pop up in a new window. Feel free to click around your website, check out your products, and so on. When you return to the Facebook Event Manager, you should see a status marked as “Active”. This means your Facebook Pixel is up and running perfectly!

Finally, Click on Next and Finish. That’s it.
Troubleshooting Common Problems
Some potential issues and fixes:
- Pixel not firing: Check code placement and conflicts
- Duplicate pixels: Remove old pixel before new setup
- Data sharing: Enable and set appropriate level
- iOS 15 changes: Adapt strategies for reduced attribution
Tips for Optimization
Best practices include:
- Tracking diverse events beyond page views
- Creating custom audiences for targeted ads
- Setting up conversions to track goals
- Optimizing based on pixel data
- Staying updated on developments to the tool
Conclusion
Integrating the Meta Pixel provides data to optimize Facebook campaigns. Following the setup process and best practices allows full utilization of its capabilities. Staying informed enables adapting strategies to remain competitive.
